3. Silver Gelatin P.O.P. Collaborative Research Project — Wet Paper Coating |
|
Emulsion making is easy. It's just cooking. However, the emulsion isn't the end goal. We want a beautiful print or a useful negative, so emulsions are coated on paper, glass, or film. Coating is the craft of emulsion making. As with any craft, practice is key. However, a few simple tools and techniques makes successful paper coating almost a guarantee. The quality of any coating is dependent on a flat, level surface that stays flat and level until the gelatin in the emulsion has set solid. High quality medium weight watercolor paper swells when it gets wet. Swollen paper isn't flat. Silver gelatin emulsion is different from most other emulsions. It does not sink into a paper's fibers. It stays on the surface. Because we apply emulsion warm and fluid, and it stays fluid until it sets up, emulsion won't stay where you put it if the paper doesn't stay flat. Fortunately, if we pre-wet the paper, and then squeegee it down on a flat and level coating surface, the emulsion will stay exactly where it's applied until it sets up and dries. The chapter "Coating Paper and Film" in my Blurb book lays out the process, including some important facts about watercolor paper. It is free to read in Blurb preview (the link is on the homepage). I recommend reading the chapter before you continue. The following is an outline of how to practice wet paper coating. Wet Paper Coating
Tools and Materials |
|
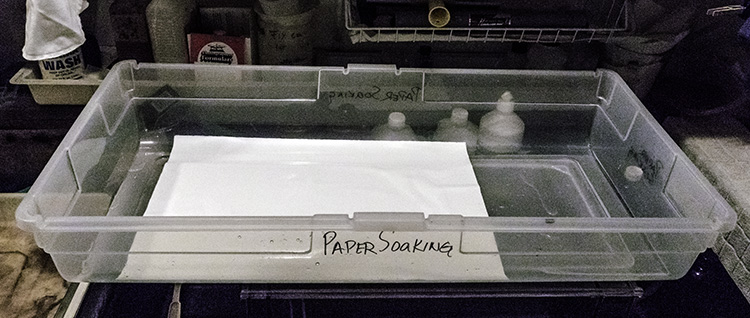
Soak the water for 30 seconds to 2 minutes, depending on how heavy it is. The paper must be thoroughly wet. Pull the paper out of the water and carefully lay it down on the coating surface, making sure it's flat and smooth, without big captured air bubbles. The paper should be front side up and oriented so that the grain of the paper runs parallel to the long side of the sheet.
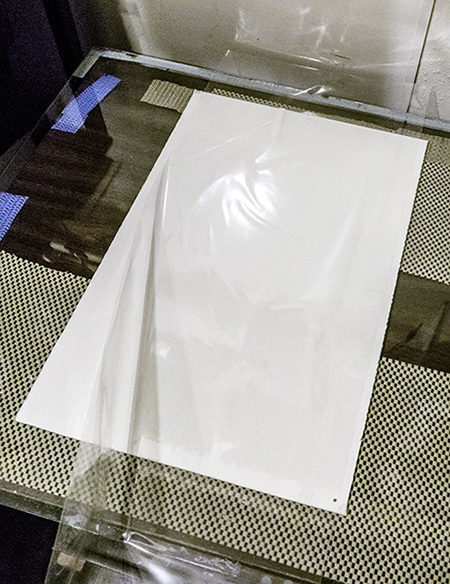
Place a sheet of mylar on top of the wet paper. By hand, smooth the mylar so that there aren't any wrinkles. |
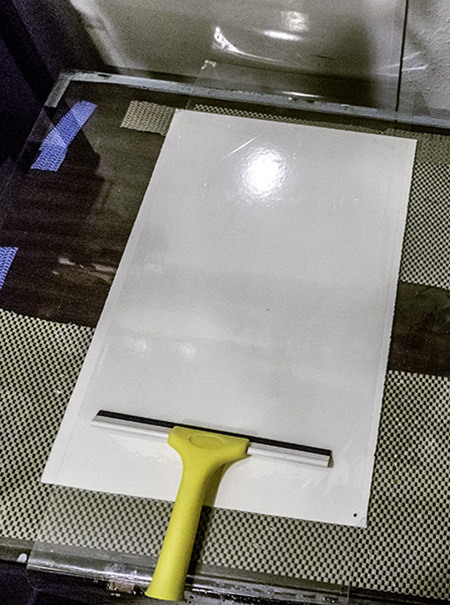
Starting at the top of the paper (and Mylar cover), pull a squeegee down the length of the sheets. Don't be afraid to be firm, but excess pressure isn't necessary. (You'll almost immediately understand the right pressure.) Do this again. If your squeegee is narrower than the paper, pull down along a different path. If your squeegee is wider than the paper, you will probably want to cut off some on each side so that it fits without being at an angle. The first pass or two will pull off a lot of water. I usually pull the squeegee right off the end of the table and let the water fall on a towel I've got on the floor. When very little water comes off, the paper is prepped for wet coating. Remove the mylar sheet and use it for the next piece of paper. If the humidity in your darkroom is very low, you may want to leave the mylar on the paper as long as possible. Use a separate piece for each sheet of paper you are prepping. Getting a pack of Clear Bag print storage bags in the right size makes this easy. Use a clean towel to wipe up excess water around the paper and on the edges. |
Make a coating trough with two guide bars. These are just 3/4-inch square wood dowels/trim from a building supplies store, cut to the exact width of your coating table. I've wrapped mine in plastic shipping tape (down the length) to make them smoother and easier to clean. Determine the spacing with your puddle pusher plus a tiny bit. Two puddle pushers makes this easier, but only if they are exactly the same length. Two prepared puddle pushers is a good idea, regardless. Accidents happen and glass breaks. If that happens while you are in the middle of coating, you will be glad you have a backup handy! (Do you hear the voice of experience? :-) |
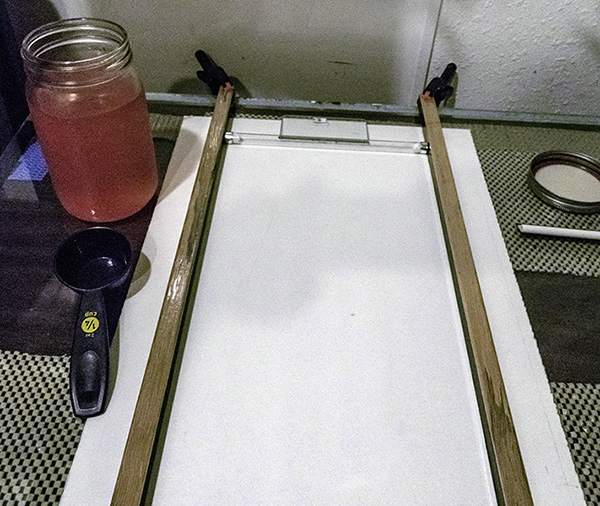
Take your faux emulsion out of the refrigerator. Place a puddle pusher (prepared for coating) at the top of the trough. Fill the measuring cup with emulsion. With your dominant hand take hold of the puddle pusher handle and with your other hand pour a line of emulsion along the length of the puddle pusher. Immediately pull the puddle pusher down the trough, making sure to maintain contact with the paper. No need to as fast as possible. A steady pull is more important. It will take just a bit of practice to understand the correct speed. Maintain the steady pull until your run out of emulsion. If I've poured out too much, I pull right off the table. If you stop short of the end of the paper, and there is still emulsion pooled there, it will dry to an unusable thickness. The goal is to have just the right amount of emulsion to get almost to the end of your paper in one smooth pull. |
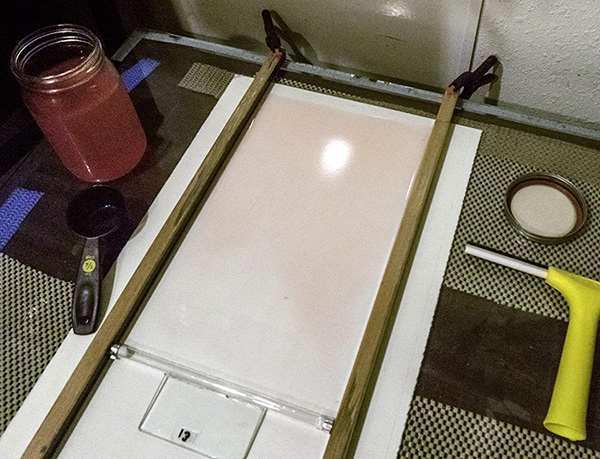
A second goal is to have the emulsion run out in as close as possible to a straight line. In this illustration, I poured more emulsion on the right side of the puddle pusher than the left. The emulsion ran out earlier on the right side. This isn't by any means a disaster. When you are coating paper to print, the uneven portion at the bottom of most sheets of coated paper becomes the test strips for printing. Nothing is wasted, except overly thick emulsion (This is the reason to not stop pulling until the puddle pusher is out of emulsion or off the paper. TIP: If you run out of emulsion before you reach the end of the paper, mark the end of the emulsion trail before you hang the paper to dry. This avoids the chance of printing on uncoated paper. Before the emulsion dries, it is clearly visible under darkroom light. After the emulsion is dry, it’s nearly invisible and you can’t see where the emulsion trail runs out. A permanent marker works in a pinch, but the best thing I’ve found is a dark shade of a water-based pastel. I use Caran d’Ache Neocolor II. You can make dozens of practice coatings on the same piece of paper. Just squeegee off the faux emulsion and start again. Making the faux with starch rather than gelatin is a real advantage. It does not make the mess that congealing gelatin does. |
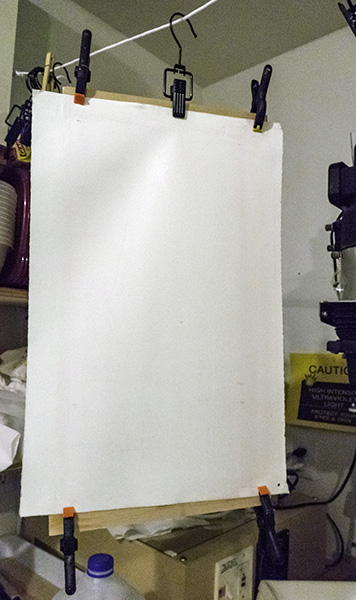
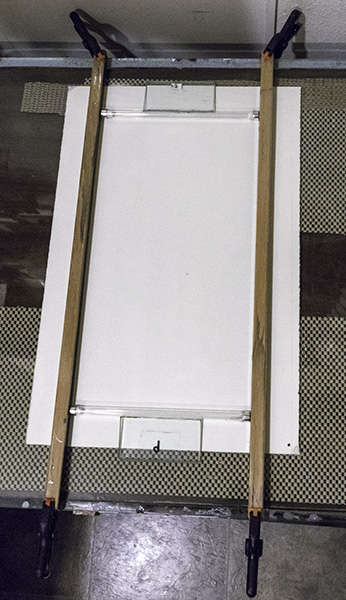
The last step for excellent paper is proper hanging to dry. After the emulsion has set up, but before it is dry, remove the guide bars. Slide a piece of wood trim under the top edge of the paper. It should be about the length of the width of the paper. I use scraps of wood baseboard trim and 2 x 1/4-inch flat trim (leftovers from various home improvement projects). The solid edge behind the top of the paper lets you smoothly pull the paper off the coating table without it folding back on itself and ruining the drying emulsion. Attach a hanging clamp in the middle of the top edge, and a spring clamp at each edge. Repeat the spring clamps at the bottom. The paper dries almost flat, rather than in a tight roll. Denise Ross |
|
|
| < Getting Started Reading #1 > |