9. Silver Gelatin P.O.P. Collaborative Research Project — Recipe #1: KCl/Citric Acid, p.3 |
TONING POP color can be a challenge to study. Different densities have subtly different colors. In a standard, untoned black and white print, the color of the deepest shadow is simply a darker version of the grays in lighter areas. This isn't the case with POP. Because of this, exposure times can shift the colors of a print, primarily within the midtones. For most prints, this isn't a big issue, but for some, it is. Best to try to get a handle on it; easier said than done, at least for me. A wet print is a strikingly different color than a dry print. Also, dry-down is considerable. It's hard to judge a wet test print. It's a good idea to dry all test prints before you commit to exposing what you hope will be a final print. |
I used the set of toners in Clerc, p 333 (Index #4, Reading #1). |
|
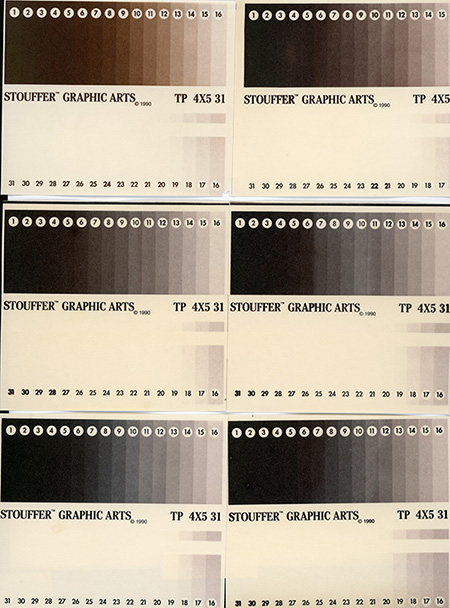
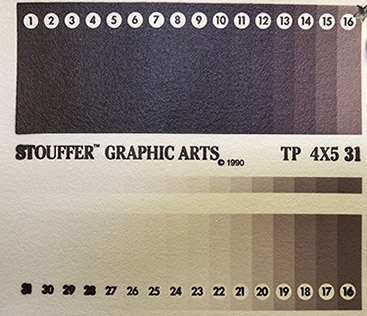
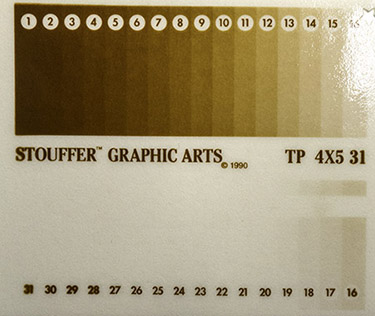
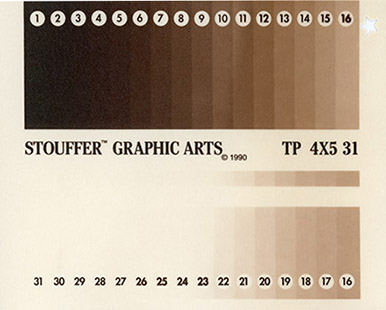
The toners did not produce the colors Clerc indicated. I'm guessing that there are distinct differences among the different POP recipes regarding how they respond to toning. Upper left: An untoned step tablet print, hypo-only development. Upper right: Clerc's fourth toner (the lowest concentration of gold chloride and ammonium thiocyanate). Middle left through lower right: Clerc's third, second, second again, and first concentration sets. The color differences are subtle almost the point of invisibility. The real difference was how long a print took to tone. In the highest concentration (bottom right), I snatched the print almost as soon as it hit the toner. The weaker concentrations just took longer to come to the same color. Pulling them out sooner didn't seem to make much difference. The prints continued to change color in the wash water. I suppose the good news in this is that if you like the color set the toner produces, then a lower concentration (i.e., a thriftier use of gold chloride) works just fine. There are a multitude of toner recipes, but I'm leaving toning for now with this recipe. I personally like the color that hypo-only development produces, at least with the KCl/citric acid POP recipe. Toning is a skill set that takes a lot of dedication to master. I've never been interested enough to work it. I sincerely hope that someone in this project takes it on. |
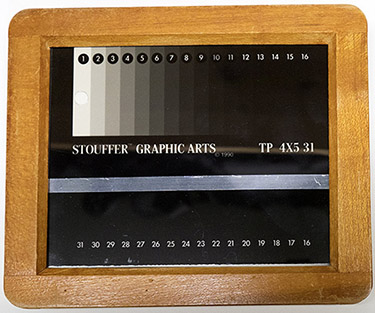
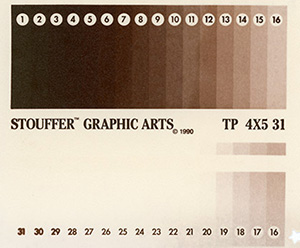
EXPOSURE Left: A piece of unexposed paper with a negative in a contact printing frame. Correct exposure is important with any type of photographic print, but it takes on a new level of importance with POP. Because the colors shift through the range of densities within a print, evaluating test strips can be interesting. First of all, the test strips or prints need to be dry. |
|
|
Above left: The exposed paper before it gets wet. Troubleshooting: The blurring of the numbers 31 to about 26 happened because the contact printing frame had loosened up. The back didn't come into hard contact with the paper, negative, and glass. I added a piece of felt on top of the paper. This tightened things up again. You can try to bend the pressure arms, but I've found that is a short-term solution. I used the dry print for the toning experiments, but it was identical to the print below left. Print color seems to be influenced also by the exposure light source. I have not chased this down so right now this observation is based solely on my limited personal experience. The print below right was exposed in a UV printing box. The color is different, but that might be because the paper got pretty warm while printing. Does heat make a difference (??). What is evident is the expanded density range. Literature suggests this is a product of decreased exposure time. However, the historical literature assumes UV exposure light. A valuable research track would look at as many different light sources as possible. The exposure in the UV box took 15 minutes, versus 45 minutes on the non-UV light panel. |

|
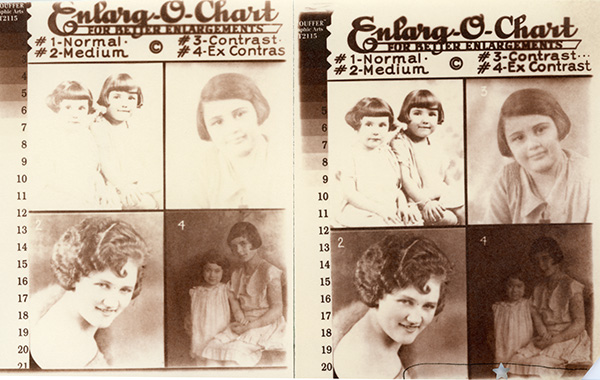
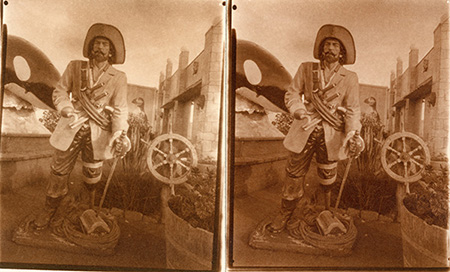
Returning to the Enlarg-O-Chart with a couple of different exposures. The print of the right was made with a test scrap. Before I coated the Arches sheets, I circled the watermarks with a waterproof pen. When the emulsion is dry, the watermark is very hard to identify under safelight. The black circle identifies it and I can cut good sheets around it and use the watermarked sheet for tests. I notch the corners of test sheets so that even when I start getting distracted and robotic in the darkroom, I don't waste perfect sheets on tests. |
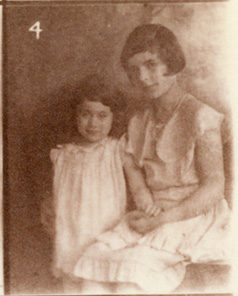
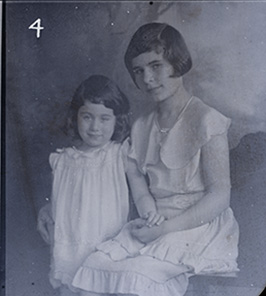
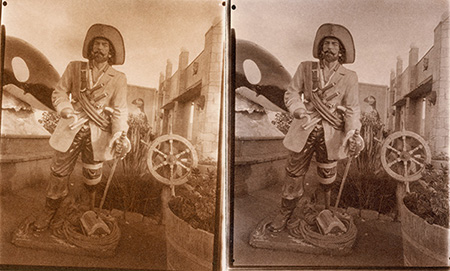
Crops from the print above left and from the scanned original negative (see previous page) show the limitations of this recipe with a severely tarnished negative. Making a digital negative from the scanned negative, and then contact printing with that, would probably be best. The crop from the scanned negative hasn't been worked in Photoshop for better quality (contrast, etc.). With a bit of effort, the final POP print could end up quite lovely. |
|
I didn't think I'd want to use this recipe for any particular personal project, but I was wrong. I'm a great fan of Léonard Misonne's work. I've never been tempted to learn his process, and of course his subject matter is from a different age, but regardless, I'm smitten. I was looking through my negatives this week and thinking that we live in a "different age" than even when I made them. We'll probably return to "normal" again, but it might be a while, and normal might look different (hopefully, much better in many ways). In effect, the recent past became the far past in the blink of an eye. |
|
I scanned my 35mm negative ('X2Ag' emulsion), enlarged it to 5"x 7", and printed it out on Helix Vellum on an Epson 3880, with a print quality setting of "2." In other words, very low quality. Pictorialism isn't everyone's cup of tea, but it is my brew of choice, so I suspect I'll be spitting out digital paper negatives and printing every negative I love for quite a few weeks. Whenever I feel "done," I'll get to work on the recipe in Baker's book. Blessings to all, 6/17/2020 |
|
|
| < Recipe #1 - p.2 Recipe #2 > |