11. Silver Gelatin P.O.P. — Baker KCl/Citric Acid, Contrast Control by Light Source |
|
November 15, 2020. It's been too long ago and so much has happened in the last couple of months that I decided on a bit of a reset. So, back to Baker KCl/citric acid emulsion, looking at contrast control. If we are printing with digital negatives, then easy-peasy. Fit the negative to match the material. However, if we want to contact print from original sources, then it's usually required to fit the printing to the negative. One option is different recipes, either completely different ingredients, or simple variations of one basic recipe. Another option is using different printing lights and the resulting different contrast curves. Non-UV light panels, generally sold as anti-SAD therapy, work surprisingly well. I'd always assumed that UV-sensitive emulsions required UV for adequate exposure. The secret is time. Exposure takes a lot longer. However, that can be used to advantage. The smaller light panels are inexpensive, so you can have more than one and keep an overlapping sequence of exposures and processing going at the same time. Actually, quite efficient. 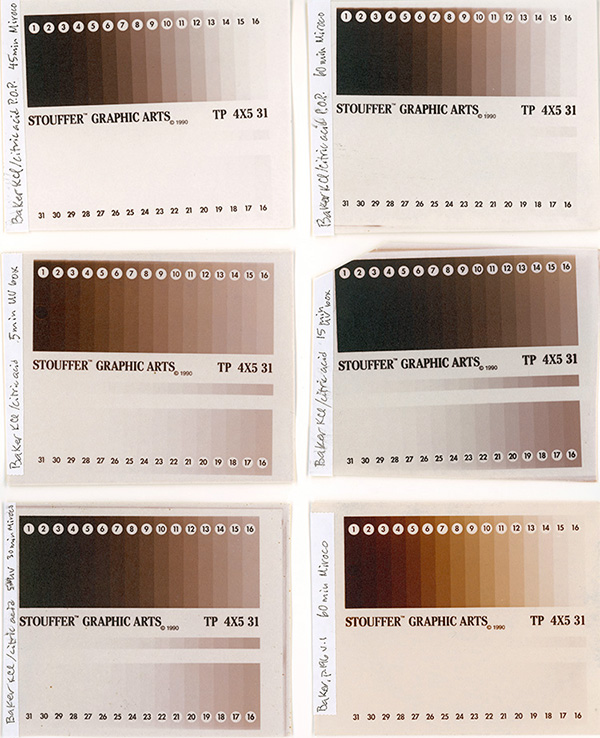
This panel of six prints was scanned and processed as a single batch. That's the easiest way I know to make sure there's an honest comparison without the scanner trying to second-guess the correct tone and contrast. Upper left: 45 minutes, light panel Upper right: 60 minutes, light panel
Center left: 5 minutes, UV printing box Center right: 15 minutes, UV printing box I don't know if it's the UV light itself, or the heat generated by the UV box (the non-UV panels don't noticeably heat up), but the prints exposed with non-UV seem cleaner, with less density in highlight areas.
Bottom left: 5 minutes, UV printing box followed by 30 minutes, light panel Bottom right: "TLF P.O.P. #2: BAKER 1941, Version 1", 60 minutes, light panel (Just for comparison. More about this recipe on the following page.) |
|
Summary: The emulsion contrast is compressed when printed with non-UV light panels compared to UV lights. A combination of non-UV and UV light would seem to allow considerable tweaking of the contrast curve. Will definitely have to dig deeper into that. |
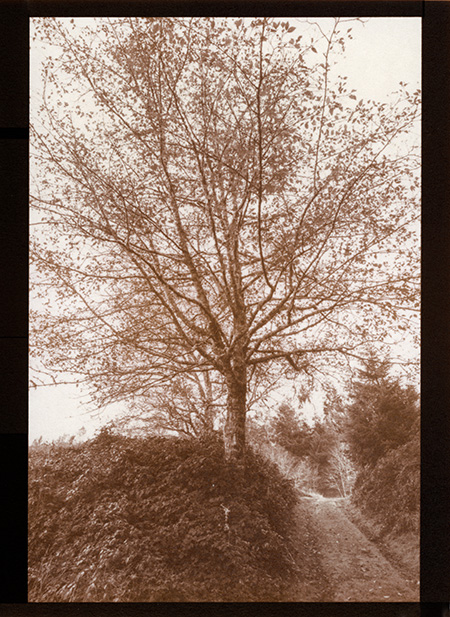
Baker KCl/citric acid POP emulsion. Rives BFK watercolor paper. Digital negative from digital file. Histogram: 36/38/33. Non-UV light panel 30 minutes. Plain hypo developer, no toning. |
|
|
| < Recipe #2 A Few Observations on Recipe #1 vs. Recipe #2 > |