Dry Plate PhotographyProblem Solving |
|
| 'Accommodation' |
| Whole Plate (6.5" x 8.5") |
| Making Lemonade (No Emulsion is a Lemon) |
|
As with all things handmade, there will be any number and variety of less-than-perfect results. The good news is that there are very few dry plate oops!'s that can't be salvaged. You can crop — either with a mat or in the enlarger or with Photoshop. And, you can be flexible with your printing methods. A good plate can be scanned, photographed, enlarged, or contact-printed, but your options may be reduced with under- or over-exposed plates. Don't be reluctant to 'spot' a plate. It was an accepted part of photography in days of yore. Tiny bubbles that can sometimes dry in the emulsion can be dabbed with black or sepia watercolor paint (undiluted, with very small brush.) The small, white mark that will result on the print can then be spotted with photo dyes. And, last but certainly not least, you can celebrate the uniqueness of handcrafted art and print from border-to-border. |
| Coating Temperature |
|
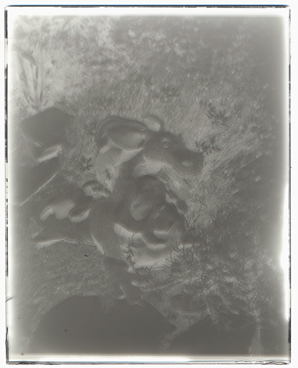
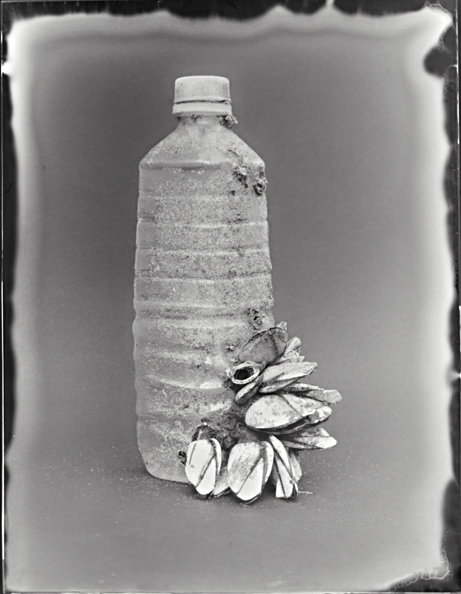
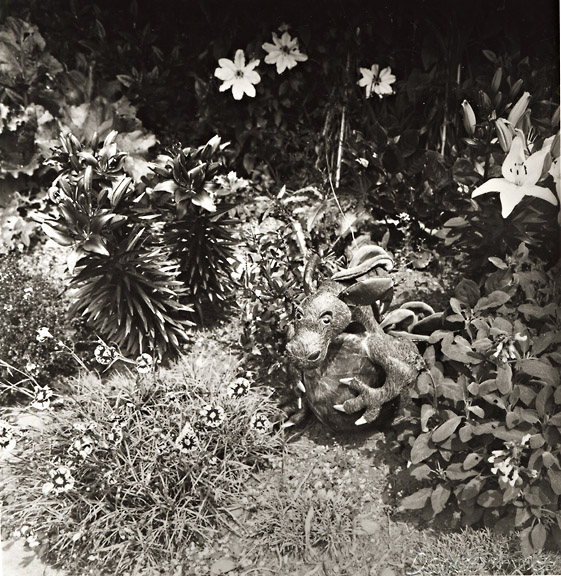
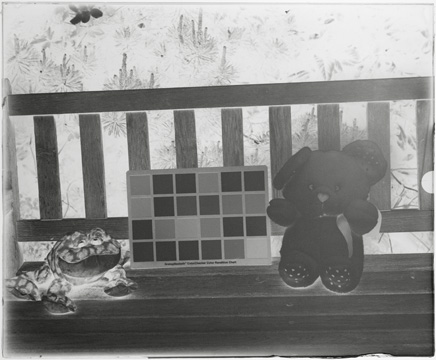
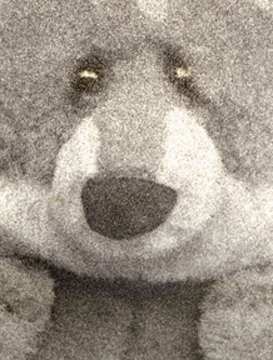
'Accommodation', the plate shown at the top of this page, was coated while the emulsion was still too warm. With a puddle pusher and emulsion well I have best luck coating at 33C-35C on room temperature glass. This time, I was in a hurry and I guessed (poorly) at the temperature. The emulsion in the center of the plate is perfect, but it pulled back from the edges. Fortunately, for subsequent plates, it was just a matter of waiting a few minutes for the emulsion to cool down. Usually, I use 'oops!' plates for exposure testing, but this time I knew exactly what I wanted to do. I had just found the barnacled bottle the previous evening and I decided the medium fit the subject. Bottom line: This plate, as ugly as the edges are, is still useable. If nothing else, it can be cropped — either in the enlarger, with the Photoshop 'crop' tool, or by selectively matting a contact print. |
| Uneven Coating |
|
The most common problem I have is unevenly coated plates. The plate below was made with the last dregs of an emulsion batch. I was pretty sure there wasn't enough to cover a whole 5x7 inch plate, but I wasn't about to throw away perfectly good emulsion. Sure enough — and no problem. While I was loading the dry plate into a holder, I noted the emulsion pattern (you can load color-blind and orthochromatic plates under a safelight, so there's never a doubt about the condition of a plate's coating). Then, I drew a 'map' of the pattern on a Post-it and stuck that to the outside of the dark slide. When it came time to expose the plate, I composed the scene to match the emulsion. Remember, what you see through the ground glass is upside down, so orient the plate accordingly. |
 |
 |
|
This is a very dense plate. For the purposes of this illustration I scanned it inside its ClearBag sleeve, with the printable image area drawn on the bag. Above: An Ilford Multigrade enlargement from the good part of the 5"x7" plate. |
|
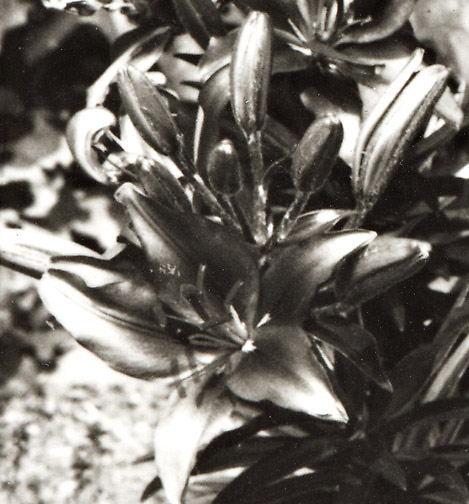 |
On the left is a detail-crop from the above print. Although the negative was dense and almost certainly overexposed, it was clean (i.e. unfogged) with good separation of values that printed very easily. This is TLF #1 emulsion. Although it was a bright day, I exposed for 4 sec at f/16. A jpeg of a scan of a print, viewed on a screen, doesn't do justice to the image quality. The emulsion is essentially grain-free and has the luminance characteristic of silver-rich emulsions. Note that the lilies were actually a bright yellow, a color the emulsion doesn't 'see' in bright, mid-day light (high UV). There is more about this in the next section. |
| Careless Handling |
|
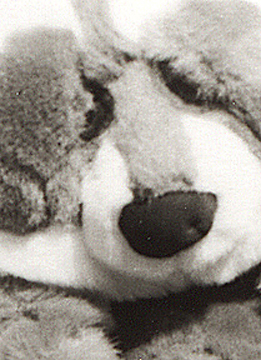
Running out of emulsion and other coating oops!'s are probably unavoidable aspects of making dry plates. Carelessness is another matter. I didn't take the time to break the emulsion between the plate and the coating guide bar and part of the emulsion ripped away from the plate. Arrgggh! Good news: the emulsion stuck to the plate through the entire development process. |
| Exposure Errors |
 |
 |
 |
 |
| Dry plate negative emulsions respond more readily to exposure and development (both accidental and intentional) than modern films. This leaves room for a lot of creative control, but it is still important to recognize the potential pitfalls. For more info, go here. |
| Sub-par Emulsion Quality |
 |
This 4"x5" plate was made with TLF #2; a batch that was particularly fast, but a bit fogged. The plate was exposed on a bright overcast July at 5pm, facing east, and Pancho was facing the light. 1 sec at f/22. Six minute development in D-19, a contrast-increasing film developer, available in The Darkroom Cookbook, by Steve Anchell. The plate is too dense and flat to be flatbed-scanned, but it enlarged beautifully. The image to the left is a flatbed scan of an Ilford Multigrade print (6x8 inches) developed in Agfa 108 high-contrast paper developer (The Darkroom Cookbook ). Below is another look at the difference between TLF #1 and TLF #2. On the left is a crop from this print and next to it is another crop from 'Pancho and Herman' (same % enlargement). TLF #1 is essentially grain-free. |
 |
 |
| The plate below is thin and flat. I knew the emulsion was fogged, but I decided to try out an exposure/developer combo that I hoped would give it a boost. Nope. Even at the highest contrast setting on my Zone VI enlarger, I couldn't get a decent print on Multigrade. Yet, it scanned beautifully. The only Photoshop manipulations were the 'burn' (shadows) and 'dodge' (highlights) tools. There's a lesson here: I almost threw out this plate — twice! — and it's now one of my favorite images. | |||
|
|
||
|
Replace This Text in js
Replace This Text in js
|
Copyright © The Light Farm |