Chris Patton
 In 1961 my father told me "You took it, you develop it." I was seven years old.
This has resulted in my never having sent black and white film in to be developed.
In college I studied biology and photography. My student apartment room was a darkroom so I could
avoid the overcrowded university one and of course I also had a microscope and a bacteria incubator.
I ended up with a degree, which was essentially a double major, in biological photography
from the University of California, Santa Cruz, in 1976, highest honors.
I have been working at
Stanford University's
Hopkins Marine Station
since 1978 as a photographer, microscopist (light and electron), computer programmer,
web designer, animator, illustrator, & safety officer.
In 1961 my father told me "You took it, you develop it." I was seven years old.
This has resulted in my never having sent black and white film in to be developed.
In college I studied biology and photography. My student apartment room was a darkroom so I could
avoid the overcrowded university one and of course I also had a microscope and a bacteria incubator.
I ended up with a degree, which was essentially a double major, in biological photography
from the University of California, Santa Cruz, in 1976, highest honors.
I have been working at
Stanford University's
Hopkins Marine Station
since 1978 as a photographer, microscopist (light and electron), computer programmer,
web designer, animator, illustrator, & safety officer.
I taught pinhole photography with Martha Casanave through the UCSC extension for many years and once through the Center for Photographic Art. I continue to help with guest appearances in her classes at two junior colleges. I handle the tech side and she the aesthetic.
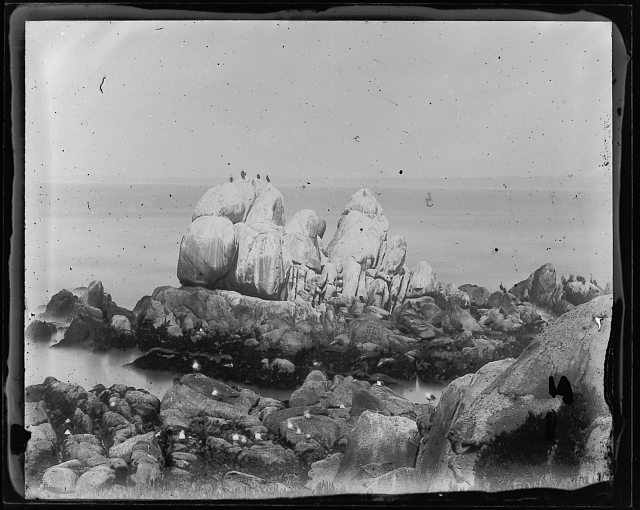
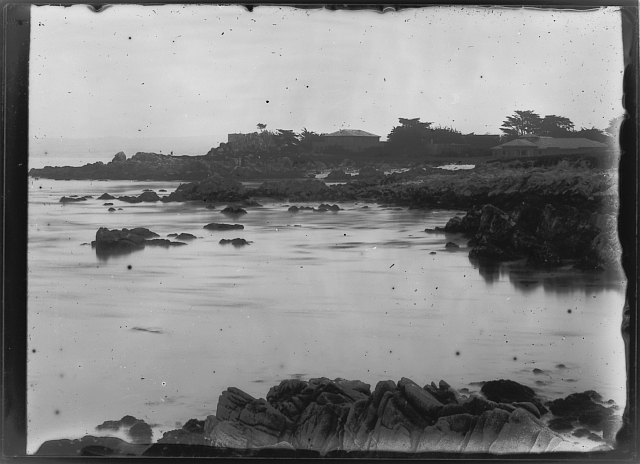
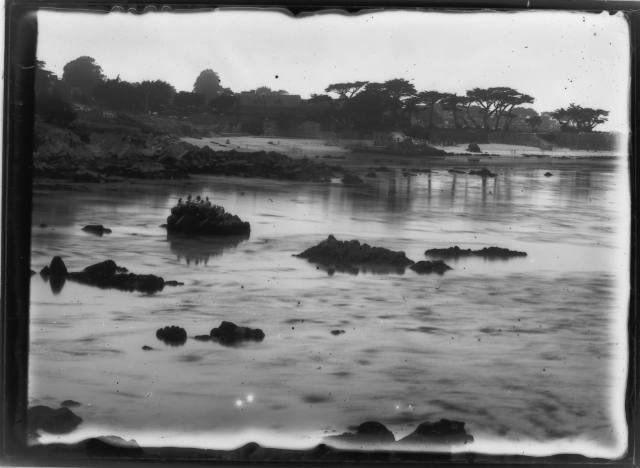
I am curious about all aspects and types of imaging. The thrill for me is in the seeing and learning a new technique. I love to figure things out. I have done: color, black and white, most alternative processes, toning, macro, light micro and electron microscopy, extreme wide angle to telescopic, lensless, 8mm to 8x10. I love large format silver negatives the best. Unfortunately, large format images on a web site are mere shadows, the quality and subtle nature of the toned and POP images have to be seen and touched to be appreciated, and wet plate images have to be experienced as a process.
In regards to the dry plate process: I tried wet plate but was turned off by the insane danger of the materials and the inconvenience of carrying a darkroom around with you. At first I tried to get around the danger aspect by working with agar instead of collodion. I had some success, but not easy to repeat without a machine to lay down the emulsion and I would still have to have the darkroom on my back. I want handcraft, not machine craft. That led me to dry plate. I researched the old literature and consulted the bible of silver imaging The Theory of the Photographic Process, 4th edition. Ed. T.H.James of Eastman Kodak. Everyone was trying for ever increasing film speed and full color sensitivity. I thought, wait a minute, I don’t want fast or panchromatic. If anything I wanted slow and limited sensitivity. The slowest emulsions were silver chloride based. I looked outside my office at the ocean and saw a bay of chloride ready to use. A couple of trials later and I had my formula. Okay, it took me a year of futzing and working out details. The Hollywood version always sounds better.
I am in love with the 1890s. That was when Stanford University, 1891, and Hopkins Marine Station, 1892, started. I am no romantic idealist. I deplore the racism, sexism, classism, plagues of yellow fever, cholera, typhoid, TB, etc. of the time, but this seems to have been the last time in our current history that a person could truly understand the materials and processes they used in their work. You may have bought individual lens components for convenience sake, but you could pretty much build the tools of your trade yourself. I prefer wood to metal, brass to aluminium, and film to CMOS chips. In my opinion, the downfall of the photographic art began with the commercialization of the dry plate process. Before then only the committed (as in insane?) did photography. You had to be your craft down to the bone level to do photography well. Once manufactured plates came out, any idiot could do photography. There was no longer a connection between deep knowledge and craft. Fast forward to the 21st century and we have a world filled with 'digiography'. Don’t get me wrong, I love the internet for the ability to share ideas. I would never have found the Light Farm but for the internet. It is just that most is garbage and clutter. Though the Age of the Extrovert is upon us it was the introverts that made it possible.
I only show my work on the internet so that others might benefit. I help others succeed but am not interested in recognition for myself (though a thank you is appreciated). Many use me as their personal servant. No matter. I live for the idea.
If you have any questions about how something was done or have comments of any kind, please feel free to write me at: Chris Patton, cpatton@stanford.edu
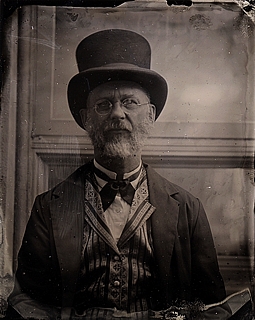
The self portrait was done with the Civil War tech wet plate process. Period costume helps to channel a feeling for a time and place long lost.
 >>>
>>>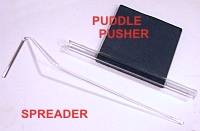 Using a syringe, measure out needed amount for one plate and place onto the center of the plate. Using a spreader glass or puddle pusher push the emulsion around the plate until the entire surface is covered. Tapping the spreader glass against the plate helps level the emulsion. You can pop bubbles with a twisted piece of paper towel poked at the bubble. New twist for each bubble. A wet twist does not work as well.