15. Dry Plate—Odds and Ends
Silver gelatin emulsions could be more accurately called "silver halide in gelatin." That's the reason everyone but gallery owners prefers to say "silver gelatin" rather than "gelatin silver." But, no matter the naming convention, besides the silver (Ag) and the gelatin, we have the halides. The halides that matter to photographers are chloride (Cl), bromide (Br), and iodide (I). Because they are in the same chemical family, they have similar characteristics, but there are important differences. The difference between a chloride and a bromide is the difference between a gaslight paper slow enough to work by dim room light and a negative emulsion fast enough to require a red or amber safelight.
When you were cleaning up after making gaslight paper, you saw that the emulsion was white. This is an indication that in its natural state (i.e., unsensitized), it is only sensitive to UV light, plus the smallest sliver of the violet part of the visible spectrum. If you made a pure bromide emulsion, you would see very pale yellow, indicating that the emulsion can reach further—through violet and into blue light. The addition of iodide to a Br emulsion (technically, a BrI emulsion) deepens the yellow color and as you might expect, pushes the sensitivity a bit further. Without sensitization (the addition of a chemical, usually a dye, that lets an emulsion "see" additional colors) a BrI emulsion is still blind to yellow, orange, and red, but regardless, it has enough sensitivity to be very satisfactory as a negative material.
MAKING A % SOLUTION
Most emulsion recipes pretty much match up the weight of the silver and the halide, but iodide is added in comparatively small amounts. This wouldn't be a problem if you were making a huge batch of emulsion. In the original AJ-12 recipe, 32 grams of potassium bromide only needs 0.8 grams of potassium iodide to jack up its sensitivity. To make the recipe manageable for the home darkroom, I have divided the amounts of all the ingredients by eight (with a little further adjustment). 0.8 grams of anything would be hard to weigh out on any scale a home darkroom is likely to have. Weighing 0.1 grams, accurately, is almost impossible. Teeny, tiny amounts are a common occurrence in emulsion making. Fortunately, we don't need a $1000 scale. We just need to know how to make a % solution. If you are comfortable with chemistry, you probably already know how. For everyone else, I'm going to walk through a thought process that will get you from a lot of something to a little of something.
Let's start with a 1% solution. This just means 1 gram of something dissolved in 100 grams of water (or another specified solvent). Remember that with water, 1 gram equals 1 ml. If you want 0.1 grams, you measure out 1/10 of the 100 ml of 1% solution (or 10 ml). But, 10 ml of water is a lot of extra water. If you only needed 0.01 grams, a 1% solution would be just the ticket. But, for this recipe, a 10% solution is better. So, weigh out 10 grams of potassium iodide and mix it with 100 grams of water. From this solution, you only need 1 ml, which is also 20 drops from a standard eye dropper. Any % solution can be reasoned out in the same way even if the percentage isn't as neat as 1 or 10. Also, knowing that 20 drops is very nearly 1 ml, it would be easy to get 0.05 grams if a recipe called for it. Just count out 10 drops of a 10% solution.
I haven't found that a % solution of KI, stored at room temperature, in a dark glass bottle with a tight cap, goes bad from age. Once you mix up 10 grams of potassium iodide in 100 ml of water (or 5 grams in 50 ml of water) you won't have to mix a batch for a while. Always store your chemicals with their lids on tight. If a chemical comes in a glass bottle, I like to store the bottle in a closed plastic bag. My caution comes from living in earthquake country, but it's probably smart anywhere you live. I hope it could go without saying—keep chemicals safely away from children and pets, and dispose of waste responsibly.
EMULSION WASHING
There is one more step in making a plain silver BrI emulsion than there is making a gaslight paper. This step is emulsion washing. With a plain silver emulsion (the silver is not treated with ammonia before the precipitation step) the washing process is quite short. I wash my favorite ammoniacal (a.k.a. converted silver) emulsion for two hours. AJ-12 only requires 18 minutes of washing — easily accomplished in a half hour.
The reason for washing an emulsion is to remove the unwanted byproducts of precipitation. You remember this from the gaslight paper tutorial: AgNO3 + KCl = AgCl + KNO3. Again, that just says that when you mix silver (Ag) nitrate (NO3) with potassium (K) chloride (Cl), the parts split up and rearrange in the water resulting in silver chloride and potassium nitrate. We want the silver chloride. The potassium nitrate is the unwanted byproduct. It's the same when the halide is a bromide.
It's rarely a problem for paper coating. Most papers absorb the KNO3. But, when we are coating glass or film—nonabsorbent surfaces — the byproducts will dry and crystallize out on the surface of the negative, ruining it. So we wash the emulsion to remove them. Although modern emulsion making has replaced literal washing with chemical procedures, old-fashioned washing in cold water works perfectly well—and for the price of a bag of crushed ice.
The trick to emulsion washing is to get the cold, solid emulsion into small pieces that expose a lot of surface area to the wash water. That's the reason to use something like a potato ricer. A potato ricer actually could pass for a small version of the machines used by factories fifty-plus years ago. The small pieces of emulsion produced have been called noodles, worms, or shreds at various times by various authors. That's why you'll sometimes see the process called noodle washing. There's nothing sacred about a potato ricer. It's just handy. You can also squeeze the emulsion through nylon mesh, the kind that oranges or new potatoes come in (at least where I shop). You can line a shallow glass baking pan with plastic and pour in the emulsion. After it sets up solid, you can take a sharp stainless steel or ceramic knife and cut the emulsion into tiny cubes. You just need to take the surface area into consideration. If your pieces of emulsion are much bigger than a pea, you will want to double the washing time.
There is a video clip of washing on the following page with the recipe.
SPOTTING
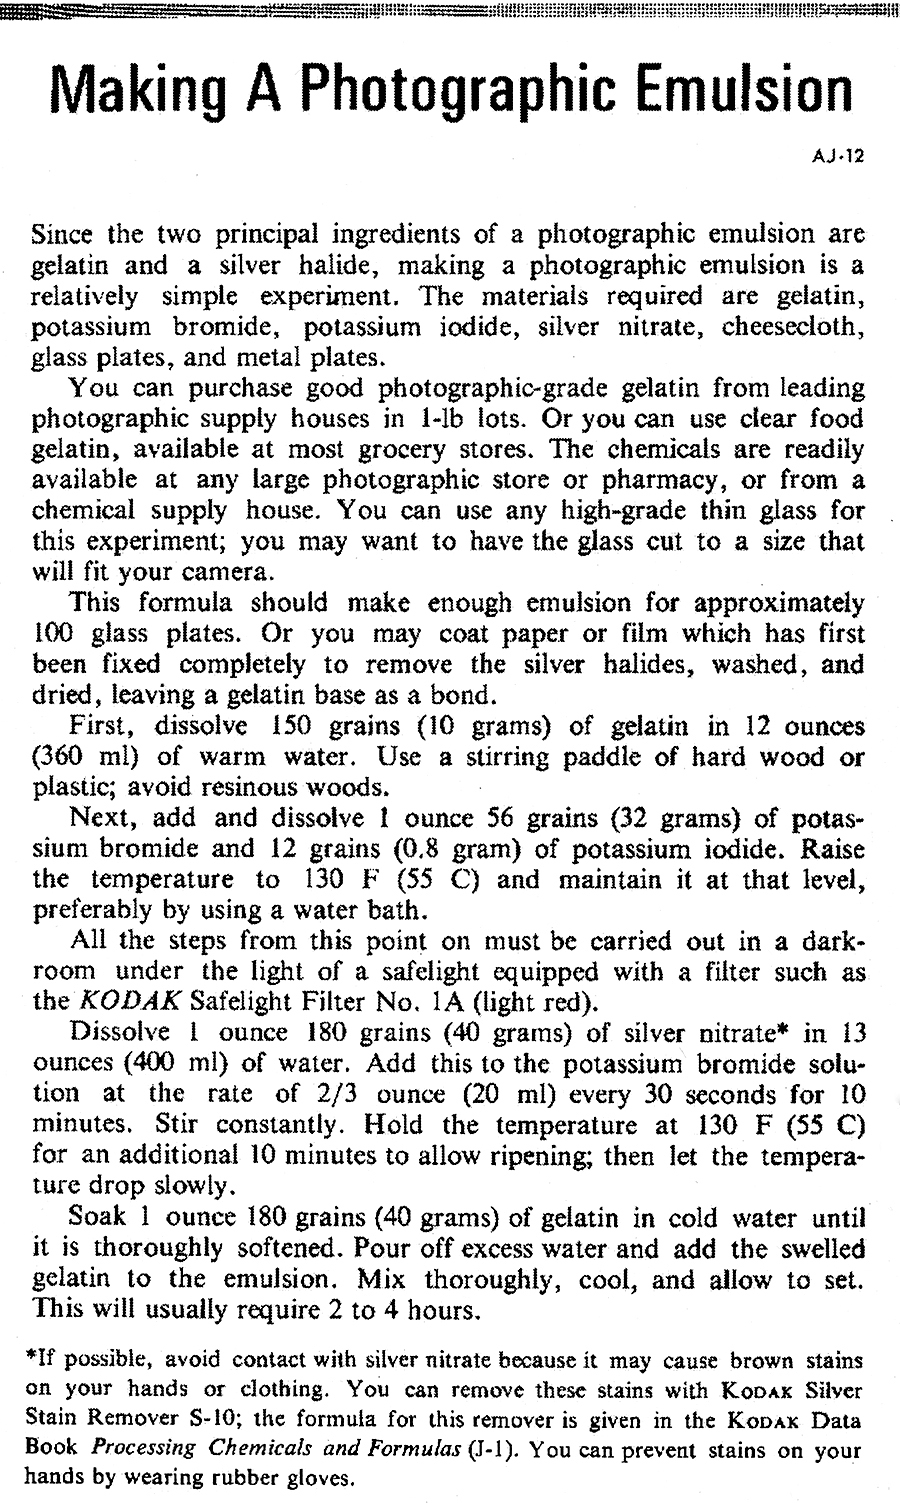
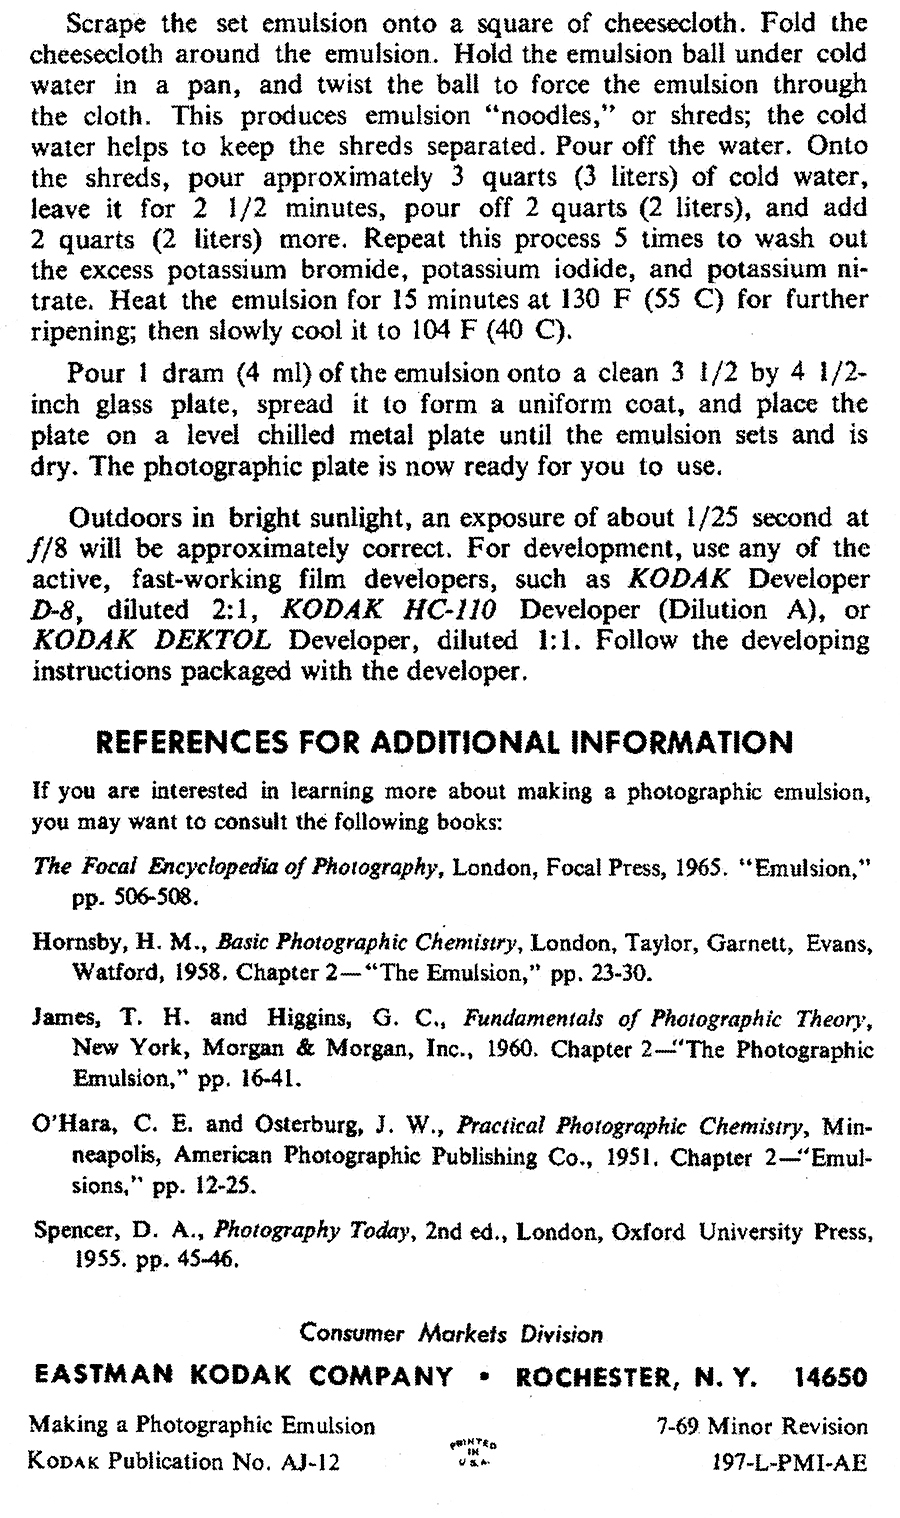
Not so very long ago, the need to spot prints was assumed. Careful darkroom work reduced the frequency, but everyone accepted that dust happens. It is all but impossible to expose sheet film or dry plates outdoors without ending up with dust spots. That's why Ready-Loads were so popular, even if they were very expensive. And of course there were (and are) the hazards of processing.
Some people enjoyed spotting. Edward Weston made it a part of his regular evening activities. Some people hated it, but everyone knew how and had the dyes and brushes required. Although spotting is something of a lost skill today, it is important not to think of needing to spot as failure. Dust still happens. With handmade dry plates, there is the added issue of the occasional micro-bubble.
Micro-bubbles look like craters in the emulsion. They are clear on the negative, but print out as a dark spot surrounded by a black ring. The only thing for them is to dab a bit of opaque paint on the bubble. Then you'll get a white spot on the print, and you can eliminate that with dyes. Dust on the negative before exposure will also leave a clear spot on the negative, but that is in the emulsion and easier to deal with than bare glass. You can spot the emulsion with dyes as long as you are careful to avoid excess water that will swell the gelatin. If you are skillful and match the density of the area around the dust spot, you may not need to spot the print, but there will almost always be at least some spotting needed on a traditional print.
There are a number of different materials for spotting. Marshall's is a well-known name. Spotone is a classic. It's best to go online and search "photo retouching dyes". And online is also an excellent place to shop for any number of older books on retouching.

PERFECT DARKROOM TRAYS
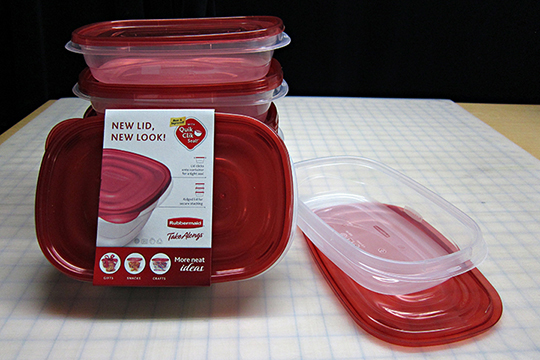
I can't say enough good things about food storage containers as darkroom processing trays. Rubbermaid makes a number of sizes so you can match a size with your format (up to Whole Plate) and use much less chemistry. The lids snap on tight and keep fumes under control, especially fix. They stack with or without their lids. They are soft plastic and never scratch emulsion. And, they have enough of a dimple on the bottom that it is easy to get your hands under a glass plate to lift it. Best of all, they are cheap. I can get a dozen for the cost of one new darkroom tray. Other brands make larger containers. With just a little shopping around, I've been able to find any size.
Kodak Publication No. AJ-12