Handmade Filters
January 25, 2012Why make filters when excellent commercial ones are available for sale? As always, there's the historical context. Photographers used to make their own. There are a number of recipes available. They're not necessarily easy to duplicate because ingredients are often listed by proprietary names — gelatins and chemicals every photographer recognized and could easily purchase. But nevertheless, the recipes are valuable guidelines. In particular and wonderfully fortunate, the yellow dye most commonly used was tartrazine — known to us as FD&C Yellow 5 — grocery store yellow food dye.
History for the sake of history is a good enough reason for any of these ventures, but for me in this case, there's more. It's about the concept of history for the sake of learning from history — as in the sense of back-engineering.
Not so long ago, I was thrilled to just get a decent image on glass. But, I guess I'm greedy. I have been surprised (to say the least) by the quality possible with artisan. Now, I want to learn to use my films and papers just as though I were buying them from a factory (albeit, a c.1920 factory.)
There's a lot to learn. With orthochromatic film, yellow filters are powerful tools, but all yellows are not created equal — not in strength and not in exact spectral response. The various brands of modern yellow filters may all differ just enough throw a monkey-wrench in my learning curve. By making a series of tartrazine filters in different densities of yellow, I'll hopefully begin to truly understand my emulsion. This in turn could lead to different variations of orthochromatic emulsions, including perhaps one that is 'self-screening', i.e. a negative that includes yellow dye in the emulsion itself.
A Recipe
15 g gelatin
100 ml distilled water
10 ml Everclear
3 drops glycerin
3 drops Photoflo 200
Yellow food dye
Notes: 1) I used 300 bloom gelatin because I wanted to justify buying it, but it is almost certainly not necessary, and perhaps even a bit too hard — (?? more testing needed??)
2) As always, if Everclear (or similar) isn't available, you can use excellent clear Vodka in double the Everclear volume called for and reduce the water accordingly. For example, this recipe => 90 ml water and 20 ml Vodka.
Tape a sheet of clean, unscratched, unwrinkled mylar to a flat surface. Tape by all four corners and in the middle of each side. As the gelatin filters dry, they shrink and pull at the mylar. If it isn't taped down, the filters don't dry flat. And, it has to be 'mylar' (a.k.a. PET or polyester film.) Acetate doesn't easily or cleanly release the dried gelatin. On the other hand, it practically falls off PET. That's the reason polyester film has to be subbed before it holds emulsion. I used a clean 'Fold Lock' print protector (mea culpa: A lot of what I use is chosen simply because it's something hanging around from thirty years of photography — taking up space. There are almost always options — and to my way of thinking, that's a good deal of the fun in this.)
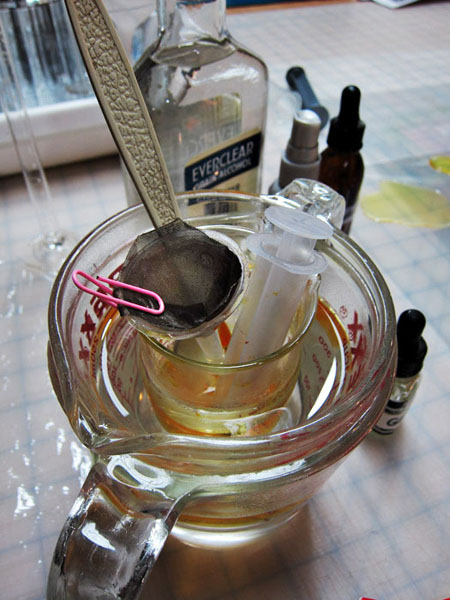
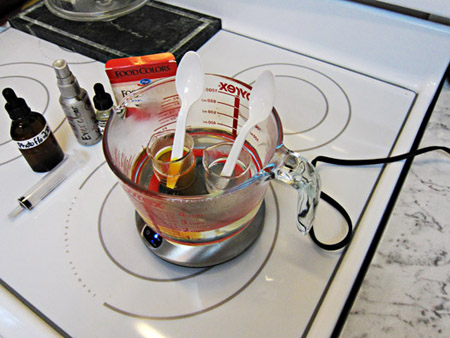
After the gelatin blooms, melt it, with constant stirring, in a near-boiling temperature water bath. The gelatin will develop a layer of foamy scum. This needs to be filtered out before the next steps. A great trick for fine filtering, without a lot of wasted liquid, is to cut a circle of filtering mesh from a 'gold' coffee filter. Make one cut to the center of the circle and then fold the mesh in on itself, forming a cone with a closed point. A little experimentation with paper first will give you the right size for fitting inside a tiny funnel. I use these little guys all the time.
Filter the melted gelatin into a clean beaker. Stir in the Everclear and filter again. Then, add the glycerin and Photoflo. Keep the gelatin very hot. Add one drop of yellow dye. (Note about the dye: McCormick's yellow is more than just Yellow 5. It also contains Red 40. As far as I can tell, the generic, cheaper store brand I can buy locally (Kroger) seems to be just tartrazine. That's what I'm using.)
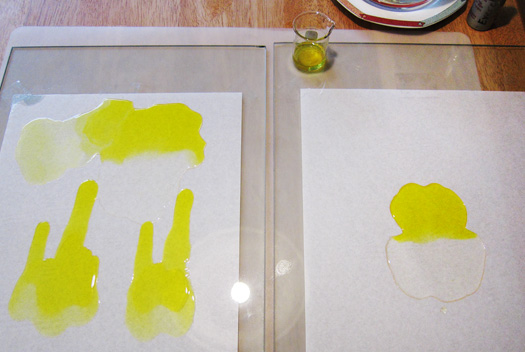
Use a monoject syringe with about a half-inch of the tip cut off to pull the colored gelatin from the bottom of the beaker. Right at the bottom, there are very few micro-bubbles, even after stirring in the dye. Squirt the gelatin onto the mylar. Have a spritzer of Everclear handy to spray away any surface bubbles. (For this, I collect the little spray bottles of lens cleaner that optometrists give away. Rinse out the bottles very thoroughly before refilling with Everclear.)
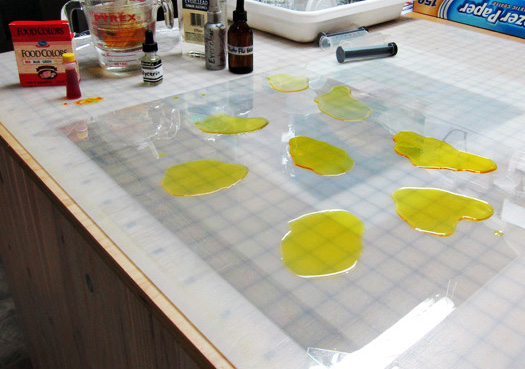
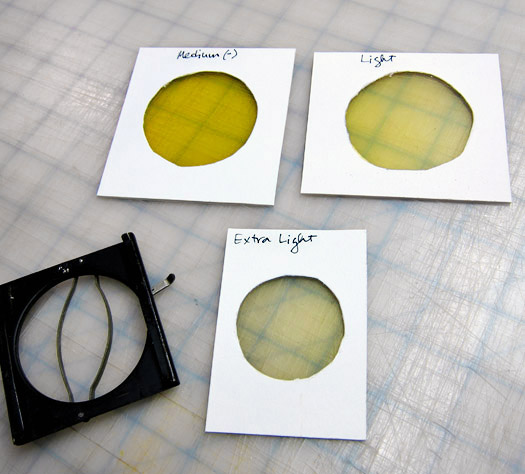
Stir in one more drop of dye and repeat the above. Keep doing this until you're out of gelatin. Each successive puddle will be a deeper yellow.
Cover the sheet of puddles with a large overturned darkroom tray or a clean plastic box. Until the surfaces set up, the puddles attract dust like a vacuum cleaner. Let dry (I had to add heat after about eight hours, because our humidity here is nearly 100% this time of year.) One last important tip: Keep the gelatin hot. The thinner it goes down, the more smoothly and evenly and quickly the filters dry.
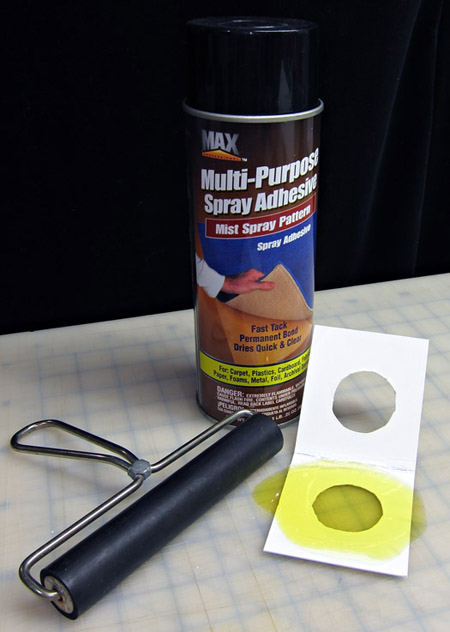
The putting-together part is pretty straightforward. Just make sure the filter is flat inside the holder. Spray the card after you cut the holes, making sure to keep the adhesive on the inside surfaces only, and away from the gelatin filter. Lay in the filter, close, press, and trim.
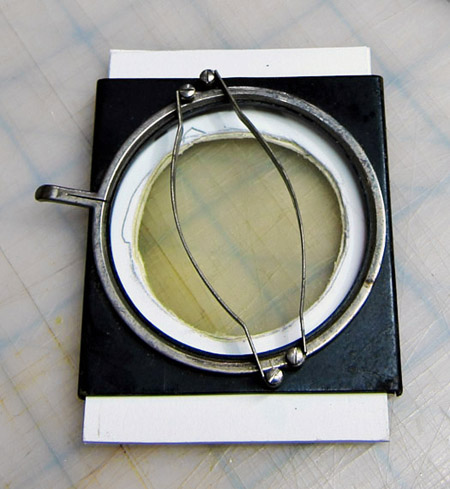
The black gadget on the above right is an old gelatin filter holder. You can buy high-quality gelatin filters, even today, I think. They always were expensive. The upside was/is that the filter holder is adaptable to different size lenses.
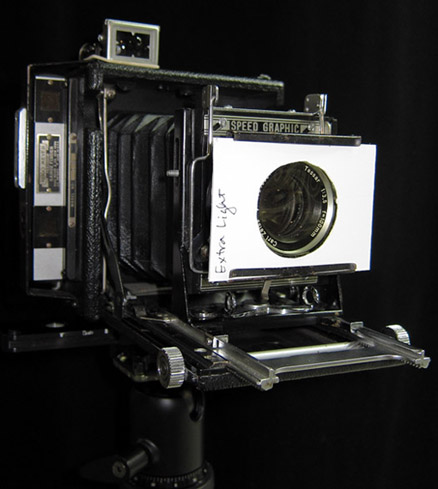
Below: The backside of the filter holder and same clipped on a lens. Thankfully, as long as the filter more than covers the lens glass, the circle cut can be scissors-crude.
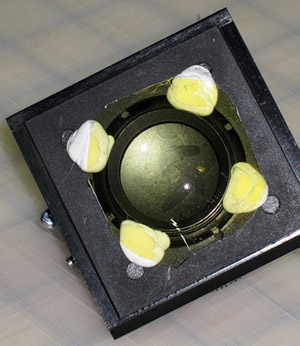
A couple of last items: Handmade filters are surprisingly good (with a little attention to quality control.) But, they are not 'commercial good'. The upside is that using one can add the look (or 'feeling', if you will) of an old lens to even the sharpest, harshest modern lens. If that's not something you want, you can attach an unmounted piece of gelatin filter over the back element of a lens. The resulting image quality is less affected by this method, and at the very least the gelatin is protected from the environment. It was a favored trick of old-timers.
And, referring back to the 'clouds' page, there needs to be a way around difficult lighting situations. Gotta love HDR (for that purpose, at least) but we have two old-tech solutions. Two-bath development is effective, but only to a point, and that at a cost in working film speed. Nevertheless, it's a tool worth learning and has other benefits. More later.

Graduated density filters are more flexible and effective. These two are 'warming' and 'ND' (neutral density). They both have rotating front elements so the density can be aligned as needed for the image.
My thought on this is to try a graduated yellow filter. I've got it made, along with 36 loaded Baby holders — just waiting and waiting and ...for a dry sky with a nice cloud or two. The 60-ft sinkhole in the highway outside my driveway is finally repaired. The floodwaters are going down. The wind has stopped and my house is still standing. All is right with the world (besides Cabin Fever.)
It took two pots of gelatin going at once — yellow and clear — and a little experimentation, but if you squirt yellow and clear next to each other at the same time, they blend just beautifully.
Hopefully, I'll be able to test the concept soon!