|
- Drill holes at the positions where you want to
install the computer ventilators. Glue the ventilators to
the box. I have positioned them on the short (right in
picture) side of the tray. Glue the computer ventilators to
the box, taking care to position them correctly respective
to the required air flow. Connect them up electrically and
check if they work. In my case, the ventilators suck out the
air and are therefore located at the air outlet position. I
recommend you to do this as well, as it will create
underpressure and keep the lid on top of the box, instead of
maybe almost blowing it of... Of course, this construction
is far from light safe, so use black matting carton, glue
and gaffer tape to create a light-tight air outlet. The
light block is constructed to require air (and light) to
travel through two full U-turns, effectively cutting out all
light. Make sure you've checked electric connections for
safety and function before you start constructing the
outlet!
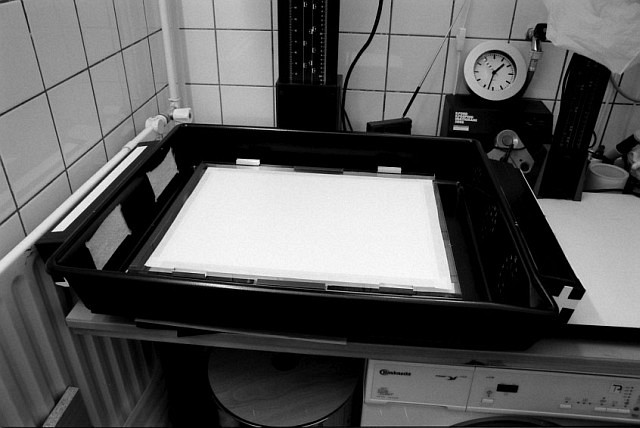
The drying box with the lid remove, air flow is
left to right in this image, with the computer ventilators
hidden in the right outlet protrusion. Notice the vacuum
cleaner filter covering up the left-side air inlets.
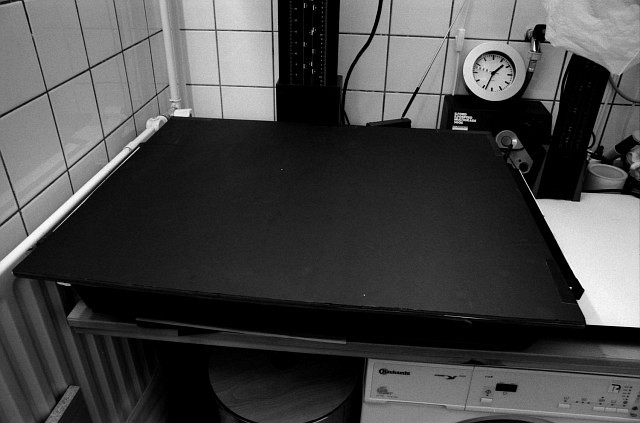
Drying box with foam board lid on top, ready for
drying session. This construction is fully light safe, and
can be left for days in the light, if needed, without risk
of fogging the paper.
- The air inlet: Drill four holes and use a saw
to cut a square hole. To avoid weakening the tray to much, I
have used two holes instead of one large one. Use the vacuum
cleaner filters to cover them up and keep dust out, see the
first picture above. Again use matting carton to create an
effective light-block around the inlet, taking care to
maintain free air flow.
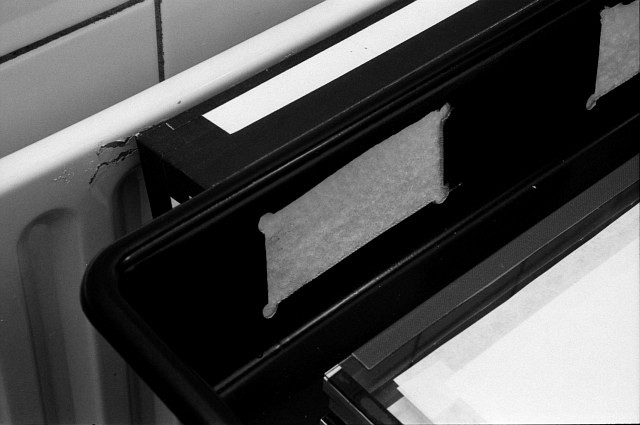
Detail of the air inlet. Note the vacuum cleaner
filter covering up the inlet to keep dust out. Also note the
protrusion on the outside of the tray. This is the
light-block created using matting carton.
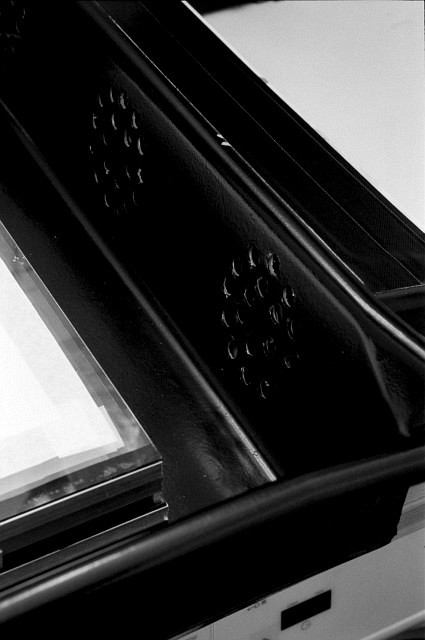
Detail of the air outlet. Computer ventilators
are hidden behind the drilled holes in this picture.
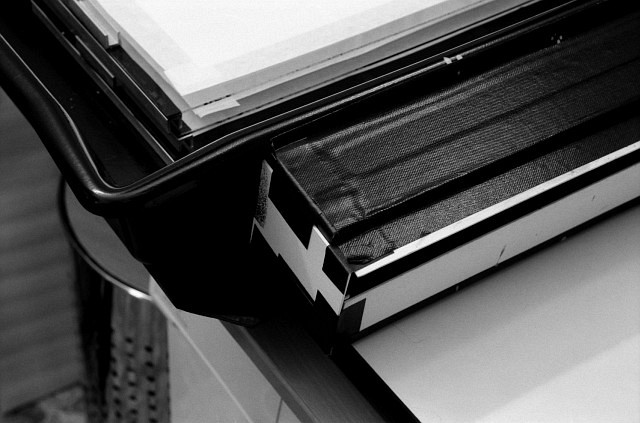
Detail of the air outlet. Computer ventilators
hidden in construction of light block, that uses two full
U-turns to block out light and guide the air flow. Air flows
out through the visible opening. Also notice the stacked
coated papers inside the drying box.
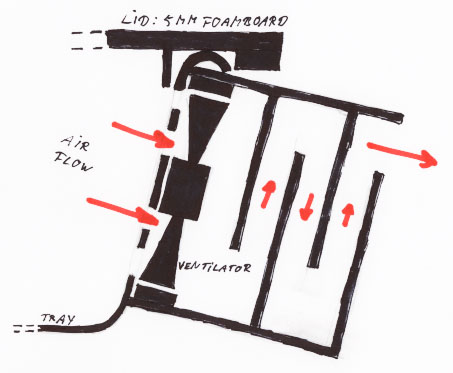
Cross-sectional view of air outlet and
light-trap. Notice direction of air flow and also notice how
the lid fits the tray.
- The lid. The lid is an important part as well,
and must be light safe. Below is a detail of the lid. Notice
foam strips and black matting carton is used to make it
light safe. One full U-turn effectively blocks light. This
is less than the two full U turns in the air in- and outlet,
but remember the ventilators will effectively cause
underpressure inside the box, sucking the lid on top of the
tray!

Detail of the lid of the box. Notice the black
matting carton and foam strips used to create an effective
light block. Also visible the 12V transformer powering the
ventilators.
- The final part of the drying box are the glass
plates. In the above pictures, you can see them stacked on
top of each other, separated by the glued-on aluminium U
beams. The U-beams effectively "interlock", keeping the
glass plates from sliding on top of each other, ruining the
coated papers.
You're done! Plug in the power and go! Since
there is no heating, it will take several hours to half a
day to dry the coatings, but excess water is effectively
sucked out by the ventilators and it is a huge improvement
over using paper boxes. To avoid buckling of papers that I
intend to coat, I pre-soak and dry them on the glass plates
using water-color tape before I effectively coat them. This
will give perfectly flat coated papers. Especially these
pre-soaked papers need a long (about 8-12 hours) drying
time, while the emulsion coated papers, with much less water
in them, will dry much quicker.
|